A change is taking place in the automotive refinishing. The days when you could simply take a car to any body shop for a complete paint job are coming to an end.
Many shops have started turning away complete resprays and restoration work because there simply isn't that much money in it. Insurance jobs, like fixing the aftermath of SUV vs. …
Setting a Goal
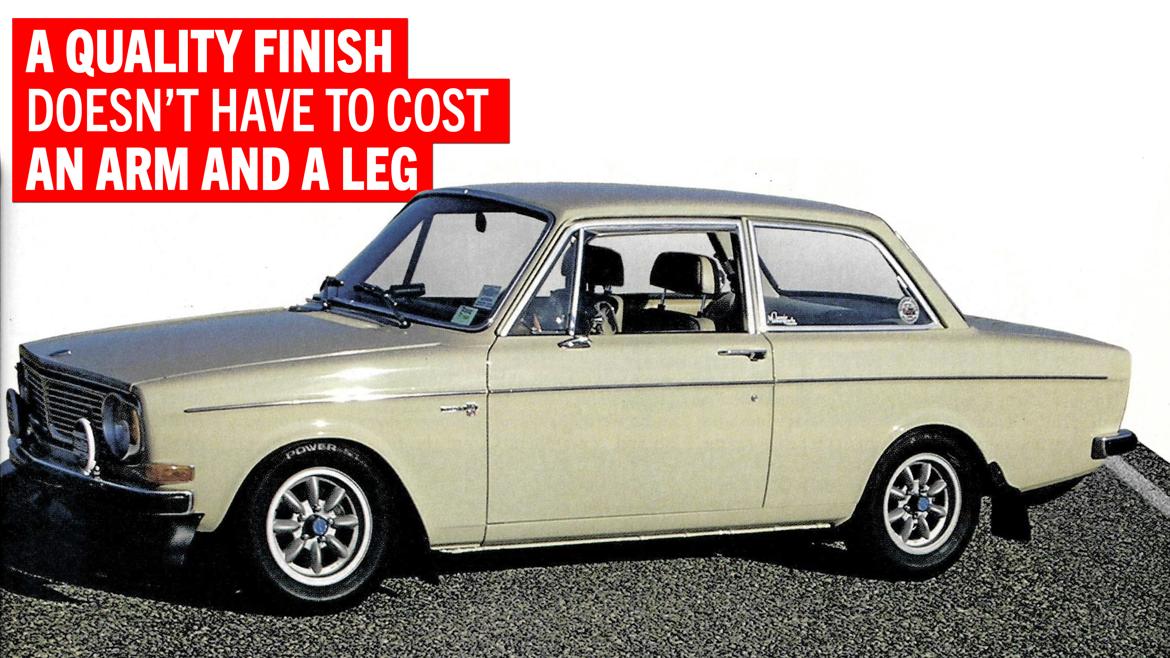
With a budget paint job, you can't expect to win at Pebble Beach, but you can certainly get a respectable-looking finish without spending a lot of money.
Our goal was to have a paint job that could win a concours at a local car club. That meant no major areas of orange peel, runs or poor underlying bodywork. The car would have to look like it just received a good paint job to nearly new-car quality standards.
It didn't have to have a mirror-like finish that looked four miles deep, nor did the body panels have to be completely devoid of minuscule waves. After all, the factory stampings on many older cars, including ours, actually have small ripples off the factory floor.
Our Volvo was an original-paint car with little rust, which is the exception, rather than the rule, for many project cars. This made it a good candidate for a budget paint job, since it was so straight and required very little bodywork and collision damage repair. Simply put, the less you have to touch a car with a grinder, the easier it is to get the finished product to look good. You can't screw up what you don't mess with.
If our car had had major body damage and rust repair needs, we would have hesitated to bring it to an inexpensive shop. Any repairs that would be made under those circumstances would be done hastily and without an eye for being correct or looking good under close scrutiny.
Preparing Your Car
The price of a budget paint job is low for a reason: The workers there are paid to do everything as quickly as possible. Since it's far quicker to mask around a part rather than unbolt it, nothing is removed from the car. Yards of masking tape are used to cover up everything that isn't being painted.
The result of this is small masking lines around everything that isn't removed, and overspray on parts that are missed. This can make even a really good paint job look bad. (We've even seen this phenomenon on jobs from the high-end shops doing insurance repair.)
This approach means there will also be a greater likelihood that the paint will peel in a year or two around windshield seals, gaskets and other parts. It's hard to properly prep the surface next to masking tape without ripping apart that tape, which then takes time to replace. Dirt is also trapped near these parts, which will prevent paint from properly adhering to the original surface.
Obviously, the best approach is to remove all these parts and pieces. Of course, removing parts is going to take time, and since you're not paying the shop to do it, you'll need to do it yourself. This is also a good time to clean and refurbish all of the parts that are removed. Cleaning, polishing and painting small parts will make even the cheapest paint jobs look better.
For the disassembly, the trick is to remove everything you can before you take the car to the shop. Everything. We removed bumpers, mirrors, lights, door seals, trunk seals and even the windows before we dropped off our car. This, of course, meant that we had to remove a good portion of the interior as well.
Since the car wouldn't have any window seals while it's at the paint shop, we wouldn't have to contend with overspray on the seals, nor would we be finding those nasty masking lines that sometimes appear around all of the windows. Sure, it takes more time to remove the interior, but the finish comes out so much nicer. There's a reason why people list "windowout repaint" as a selling point in classified ads.
Remove the windows by cutting the seals with a razor blade. This technique is easier on the aluminum trim, if there is any. While new rubber seals can add to the cost of a restoration, the old ones are often already cracked and dry-rotted from exposure to sunlight, and leaking seals will also lead to further rust repairs down the road. Replacing all of the seals in our Volvo added about $400 to the cost of the restoration, but the result is worth it. We now have no leaks and no wind noise. That whole part of the car just looks fresh.
Next Step: Cleaning
Once everything is removed from the car, take a few hours and clean the entire car with a degreasing detergent, followed by a nonwaxing car wash. We sprayed down the entire vehicle with a degreaser called Hydroforce that's sold by CRC Industries.
The entire car was then scrubbed down using a Scotch Brite scouring pad. We were beyond caring about the existing paint's condition at this point, so we were just trying to remove every last bit of wax, oil and contaminants from the finish before the car was sanded. Even sandpaper has a hard time removing soaked-in wax and silicone, as these materials are absorbed into the paint.
We took extra care in the door jamb areas, since these areas are often covered with road grime as well as grease from the hinges. By thoroughly cleaning everything, we'll get a paint job that sticks better and lasts longer.
Getting to the Shop
Unless you actually like picking bugs out of your teeth and would prefer getting a ticket, we'd recommend that you either arrange for a cow for your partially disassembled car, or at least borrow a trailer. If you do get a trailer to haul the body, you can disassemble the car further–and the further you go, the better the finish will actually be.
We live about 8 miles from the paint shop, but did we follow our own advice for transporting our now windowless and light-less Volvo there? Of course not. We put on some sunglasses and drove it there, fortunately without incident. Of course, if we had towed the car, we probably would have removed the engine and painted the engine compartment at the same time, instead of painting this part later.
Gettin' Something Extra
Franchised paint shops will often have set-price options that you can add to the base price of the respray. One option that Fact-O-Bake offered was the door jambs. This was a package that actually included painting the door jambs, the underside of the hood, the trunk jambs and the underside of the trunk. For $179, this is a good deal. Since you've prepped the car correctly, freshly painted jambs will make the car look like it's gotten much more expensive paint work.
We also had several parking lot dings that needed work, so we marked them with a quick swipe of a magic marker to make the blemishes more noticeable–and less prone to oversight by a body guy in a hurry. These were handled for an extra $50. Since paintless dent removal shops charge $85 per panel in our area, taking care of a few dings before paint was very cost effective.
One caveat about the magic marker work: If the shop is sloppy and doesn't sand or clean away the writing, it can cause problems, like bleeding through the paint. This can be especially problematic with budget paints and primers.
The Paint Itself
To keep the price tag reasonable, these shops will use lower-quality paint than many insurance-fed stores.
Nason, an inexpensive line of DuPont paint, is often used. Our shop used Nason's Ful-thane mix of paint, which is a two-part catalyzed polyurethane enamel. This was custom matched to our Volvo's paint code (No. 97 Sand Yellow or Sand Beige, depending on the translation from Swedish to English).
Despite its cut-rate price, we've been happy with the quality of this paint. The Volvo still shines well and hasn't peeled or faded a bit, even though it's been scored outside for more than a year now.
If the shop offers several different levels of paint, including lacquer, always go with the more expensive polyurethanes. They resist fade and chipping much better.
Bribes Never Hurt
At this point, the quality of the finish lies entirely with the shop and its employees. However, there are several ways you can improve the final product.
First, mention to the shop owner that you're restoring this car and you really like it and you really hope that it looks good. While this sounds sort of childish, a shop owner will recognize a customer who doesn't care about his or her car and will thus not be overly concerned if chat work is quick and shoddy. Remember, to the shop owner, quick and shoddy is cheaper than slow and good.
Second, bribe the guy. One way is to give the manager a $50 bill and say something like, "thanks for taking care of me; there's another $50 when I get the car back to my satisfaction."
A hundred bucks is nothing to sneeze at, even for a shop manager, and he'll most likely go out and check on his employees more often, overseeing the job to a higher level. If you visit the shop while the car is being sanded, you can also palm the body man a twenty for his trouble. In showing that you appreciate his work, that $20 truly can help the finished product.
Finish Work
Once the car is out of the spray booth and has cured, the shop will pull off masking tape (if there is any) and prep the car for delivery. Invariably there will be overspray in various nooks and crannies of the car.
Some shops will simply spray the wheel wells with flat-black paint, including any suspension components that are now body colored. Tell the shop not to do this. Otherwise, when you go back and clean up the suspension bits, you'll have to strip off both the black paint and the body-colored paint before you refinish them.
Instead, ask to have the car back before this step, and go buy a gallon of lacquer thinner, rubber gloves and rags. Clean off the overspray before the enamel gets too hard. It's still soft enough within a day or two of application that a lacquer thinner can be used to wipe down overspray before it hardens completely.
Once you've removed the overspray, you'll have a natural tendency to start reassembling the car immediately after it gets back from the paint shop. Try to be patient instead; wait a few days for the paint to completely harden before you start installing pans. When you do begin bolting up unwieldy pieces like bumpers, mask off the surrounding paint work so a miscue doesn't scratch the fresh finish.
Most budget shops will not color sand and buff the car before delivery, but this is an important step that should be accomplished before any trim or windows are reinstalled. Using 1600- and 2000-grit paper, you can lightly sand the entire car. This will remove any orange peel as well as dust particles that have become trapped in the paint. Follow this up with a good buffing to bring back the shine.
As long as the shop put enough paint on the car, you can often color sand and buff the car to a better finish. If you don't feel like doing this step yourself, you can pay a detail shop to do it for you. Just make sure the car is pretty straight, or the buffing will make the ripples stand out even more.
Once the paint has cured, slowly reassemble the car. Polishing pieces like taillight lenses and turn signals before they are installed will make the entire car look better. Follow up the paint with fresh reproduction decals in your engine compartment and door jambs for that concours look. These items can often be purchased for just a few bucks apiece.
The Finished Product
Our experience with budget paint shops has led us to believe that it is possible to get a high-quality repaint with proper prep work and motivation. The trick is to realize that these shops are in business to make money in volume trade, which means that you have to do everything you can yourself, short of wielding the sandpaper.
Our Volvo is not perfect, but we've heard from those who've seen it in our booth at Import Carlisle and at autocrosses that it's absolutely gorgeous. They're often shocked by how little we spent on the paint work. Remember, it's not the paint that costs money; it's the time involved to make it look good.